 Skip to content
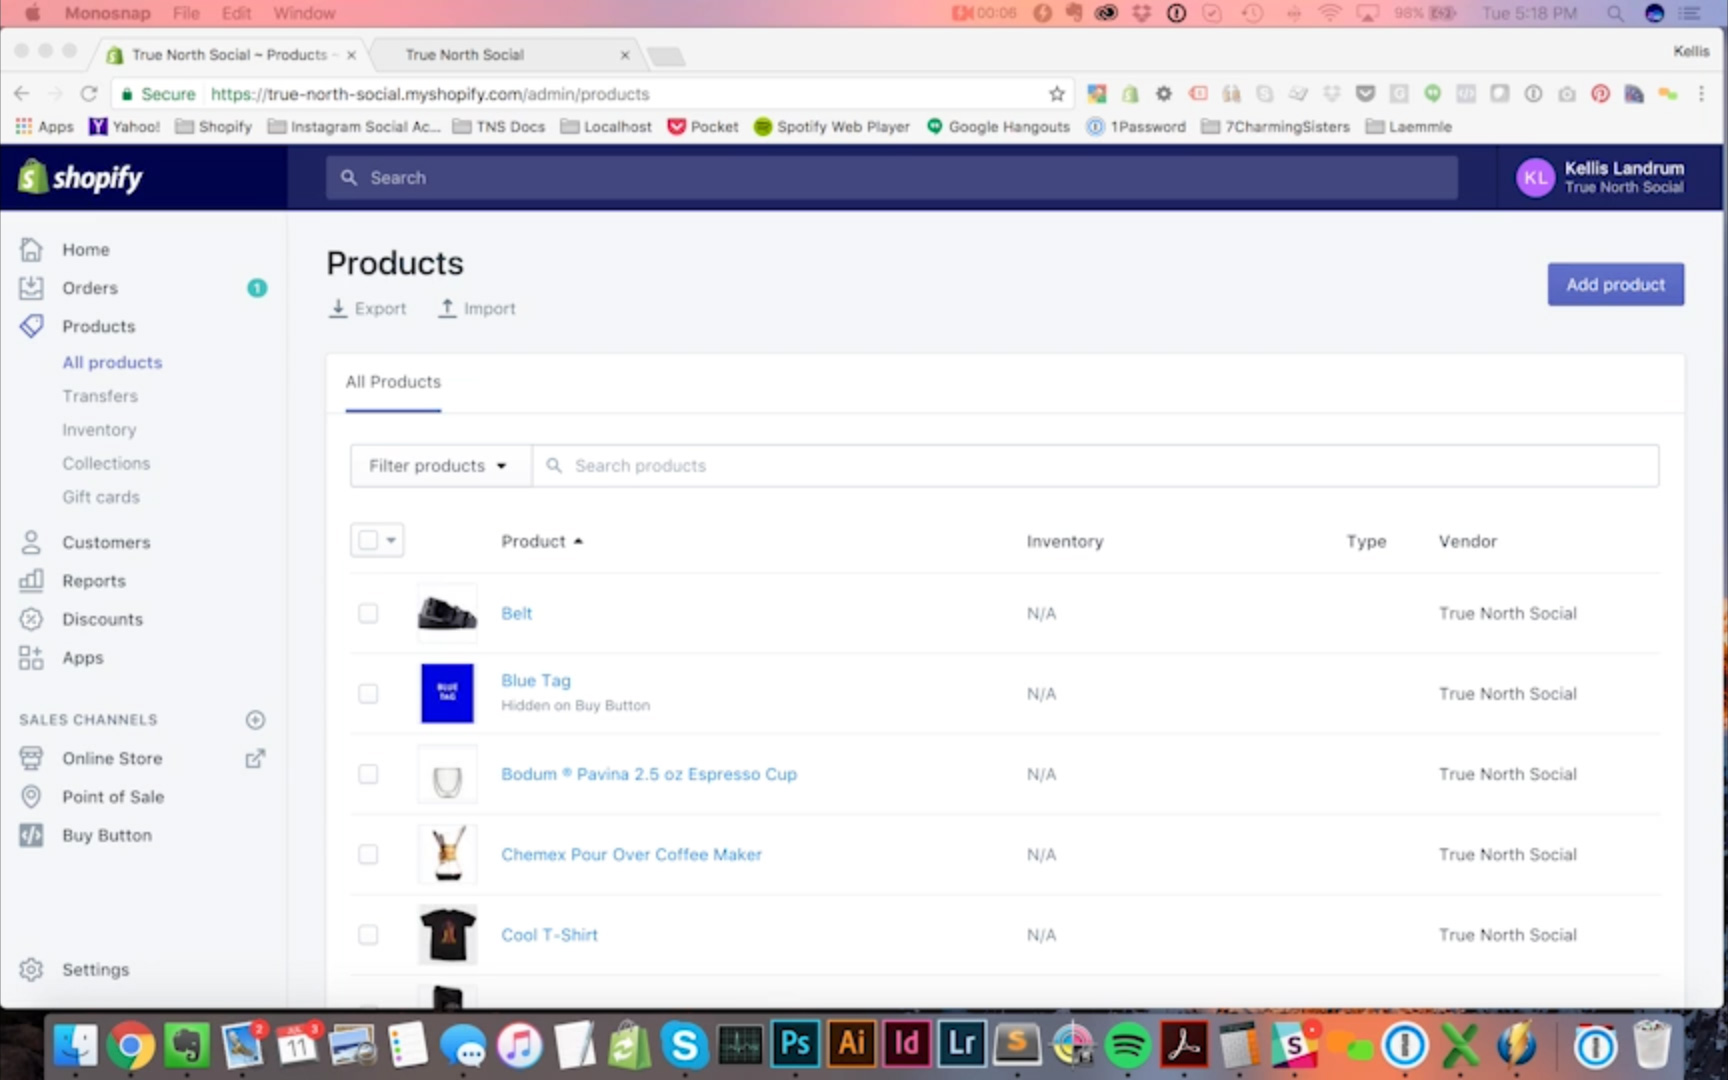
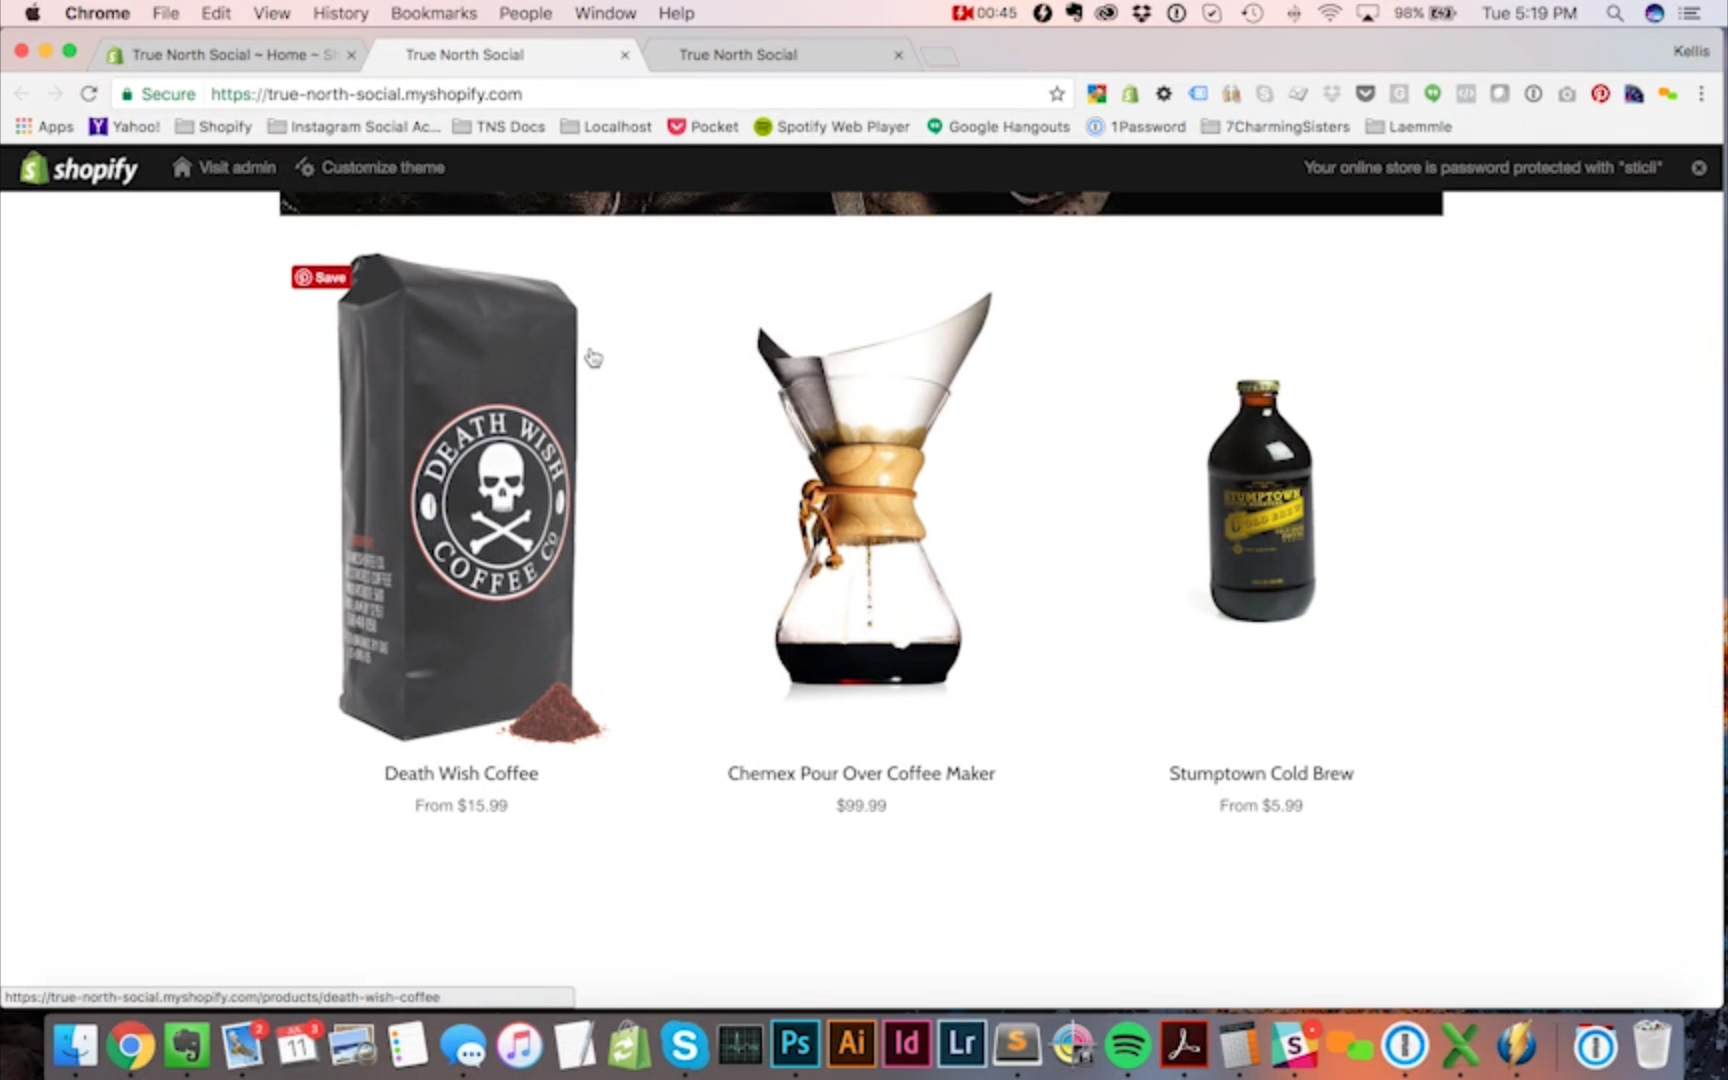
 This is Kellis Landrum from True North Social. We are Shopify experts in Los Angeles and I wanted to walk you guys through setting up products and Shopify today because this is one of the first questions most new merchants want to know when we built sites for them is, how do I add products to my store. Sort of that the basics of any store is setting up products.So just to kind of orient you a little bit. When you first log in your Shopify account you’ll be sent to the dashboard here and usually when I’m doing any sort of editing on my site, I like to pop open the front of my store and another window just kind of see what’s going on here. So you can see this is one of our test demo stores but you can see we’ve already got a few products set up here in our Shopify store already. So we can click on these and we can kind of see what a product looks like.
Now almost any product will have a few basic pieces to it because there’s just certain things you need to have in order to sell any product. One would be a title, you need a price usually you’ll have a picture of a product certainly for any physical product you’ll have a picture; might not apply for gift cards that kind of thing. But there are some additional things you can have. You can have size if there’s more than one size. You may choose to have a quantity selection to your product maybe not.
Any product page will automatically have an add to cart button. If you’re designing a Shopify store this is native Shopify functionality. It will usually have some sort of description or details about a product and then you know whatever else the site has in it. So this is kind of your basic rundown of the product.
So let’s take a look at how you add a product to your store. So when we’re on the back end of our store here, you could guess products is where we’re going to look and you can see a list of all the products I’ve created previously for my store. I could click on any one of these and edit them but what I want to focus on for right now is creating a new one. So, I’m going to hit this add a product button right over here. So let’s take a look at adding a new product.
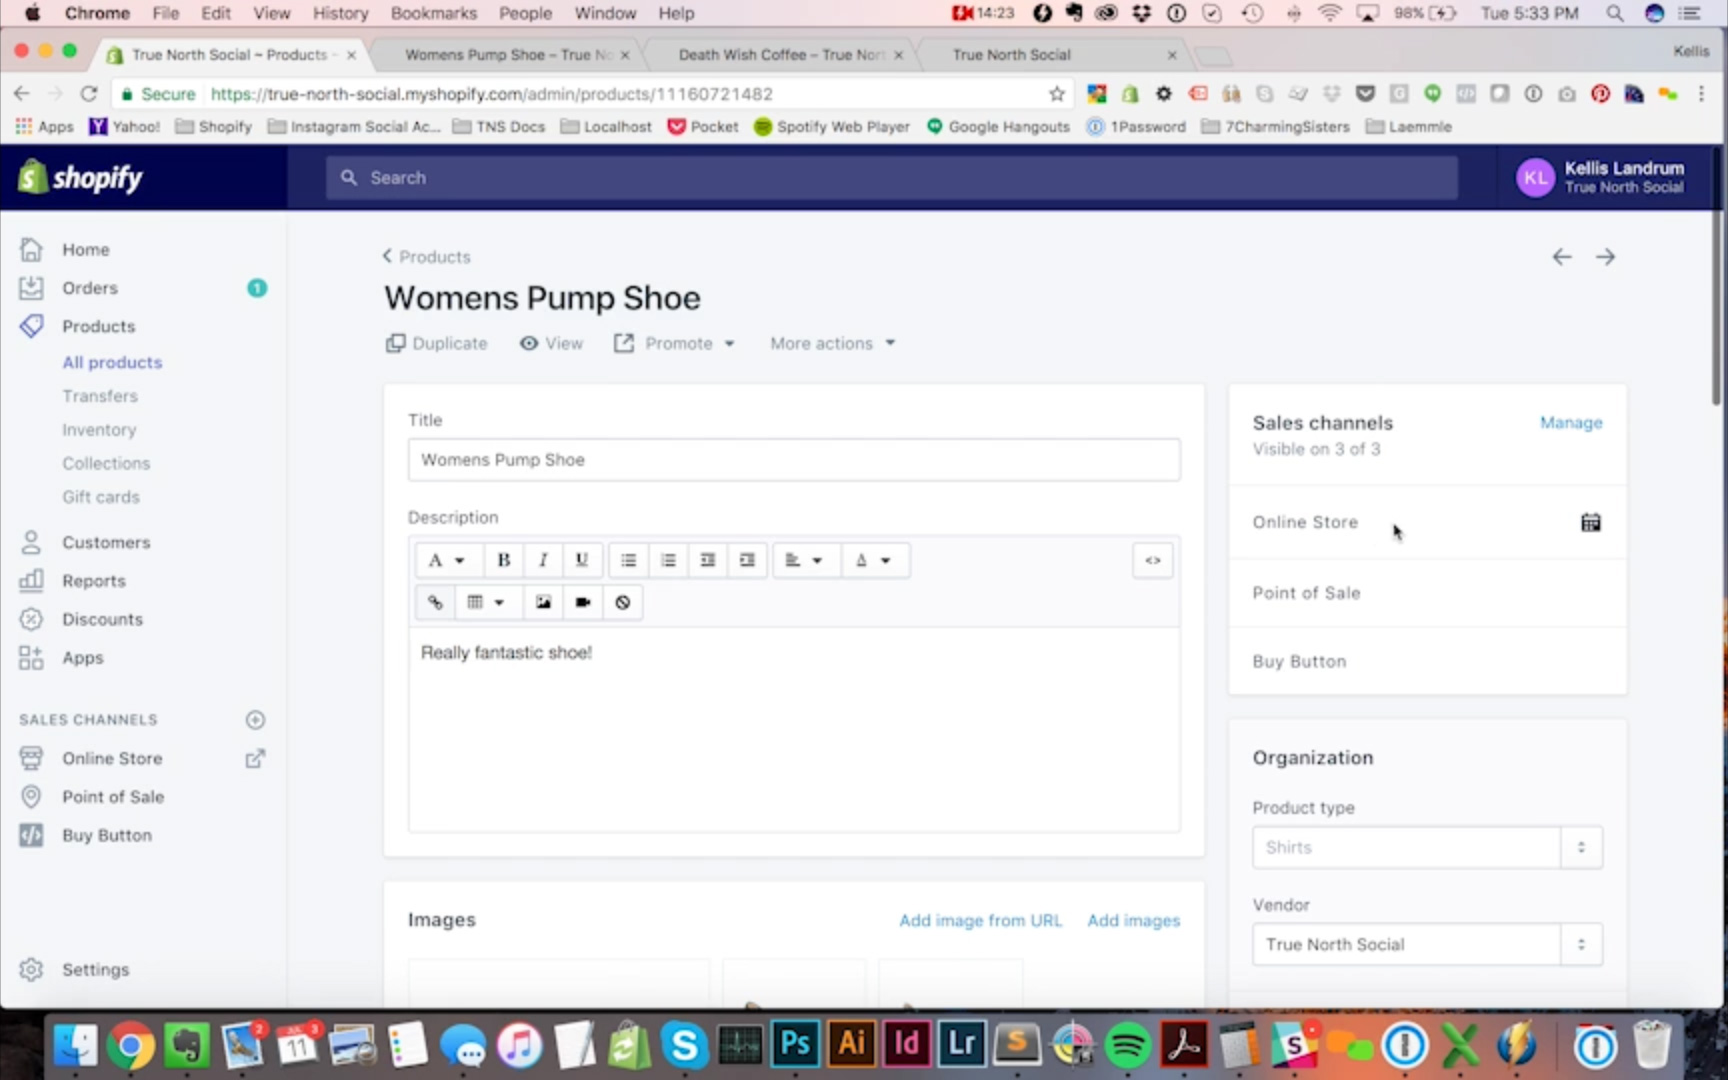
Now I’m going to add a product to my store that has a couple of configurable options just so you can see how that works and I am going to add a women’s pump to my store; say shoe just to make it super obvious. So that’s my title and I’d like to say really fantastic shoe, right. You probably want to give a little bit more details about your product. But just for the sake of setting this up that we could just have a one short line description of this product.
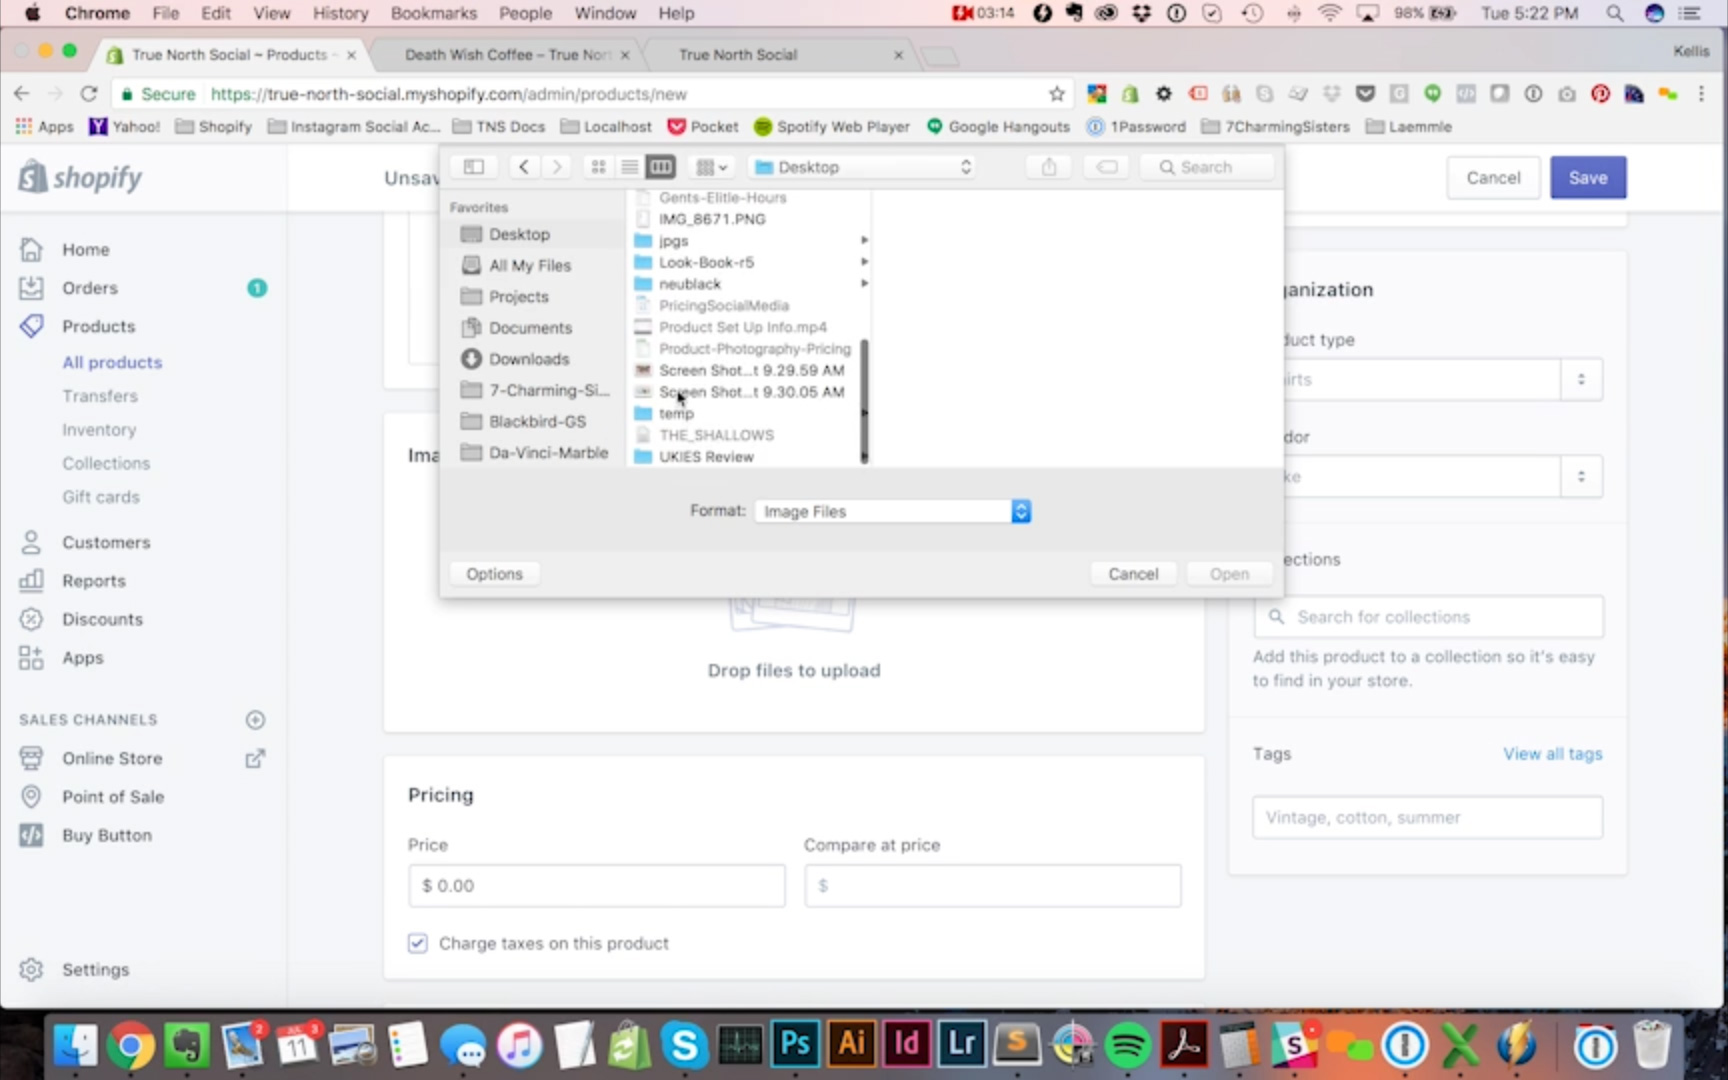
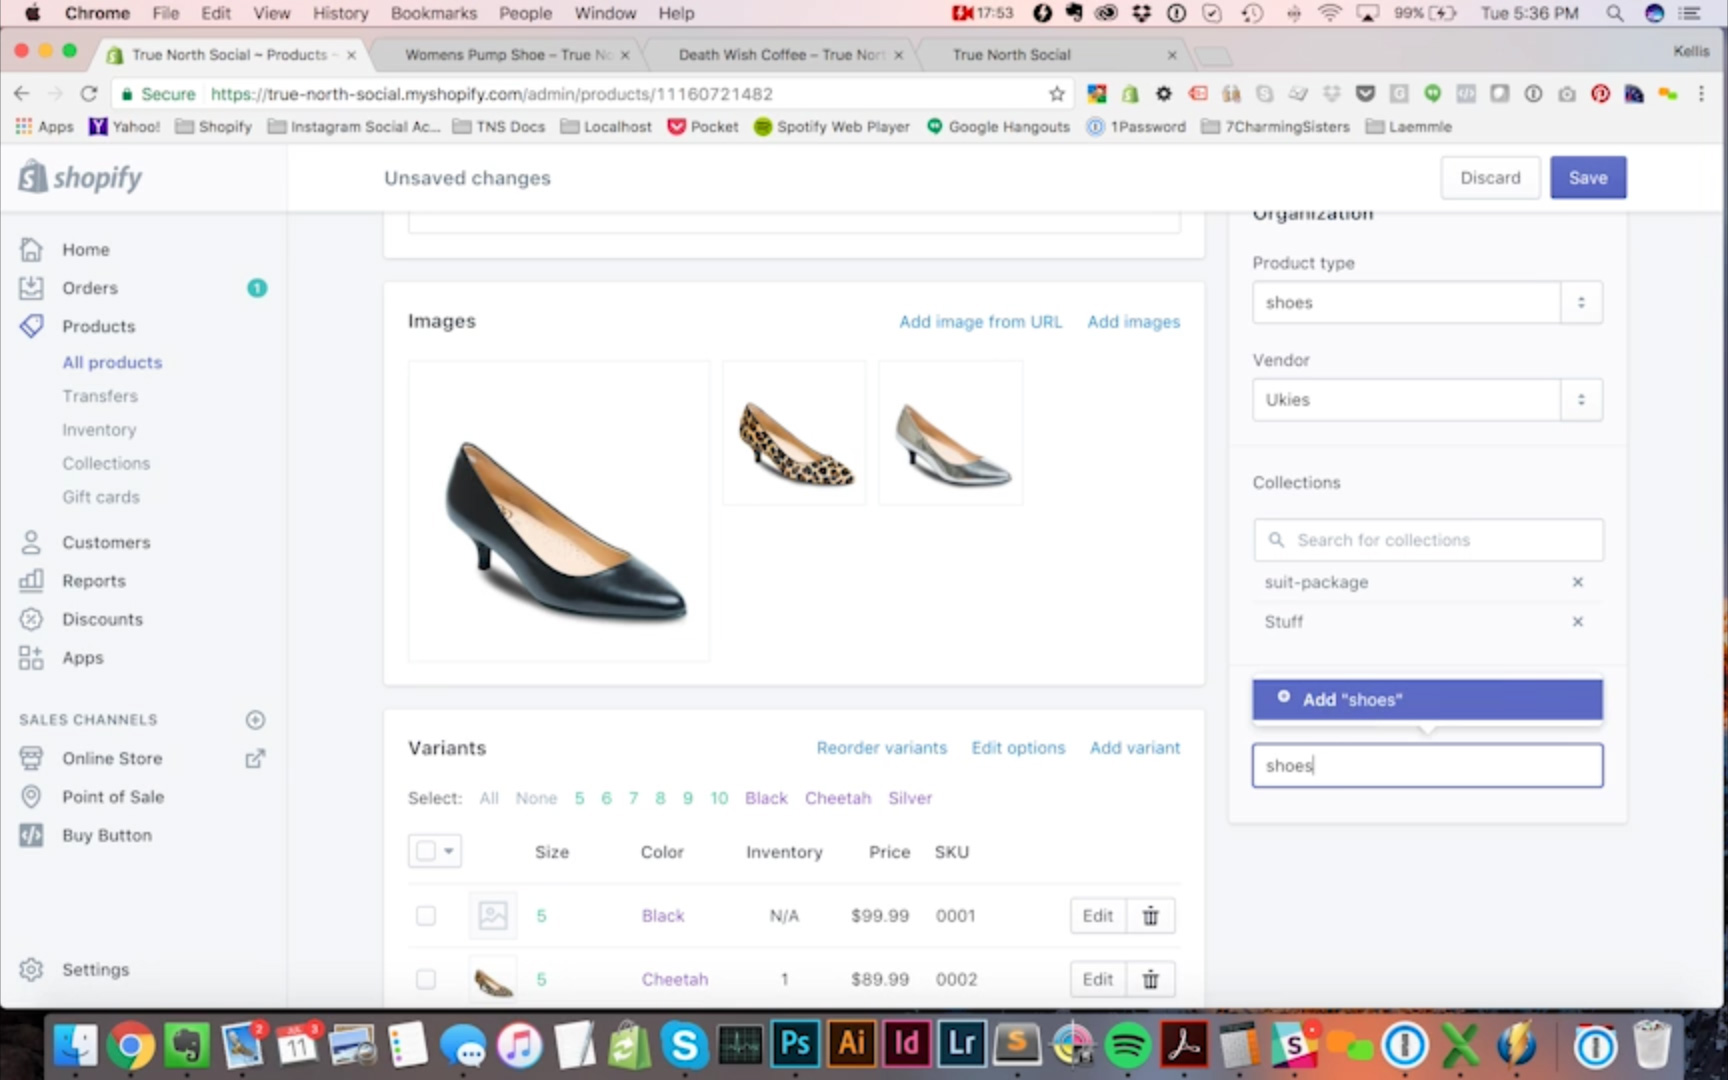
Now I’m going to need some images of my product. So I’m just going to scroll down and I need to look at my desktop here. My temp folder and I get a folder here called shoes. Okay, here’s one I’m actually going to upload three pictures of this product because you can, right.
Now you’ll see these are the images that have uploaded and whatever the big one is will be the default photo. So black is going to be my default color for the shoe. And for it now I’m just going to set up one option. I’m going to say the price of the shoe is ninety nine dollars and ninety nine cents. I might even set my compare at price at one hundred twenty nine dollars. You don’t have to have a compare our price but you can, right.
Inventory; I can include SKUs for my product. I’m going to call my initial SKU 0001 and I’m going to have a barcode in here. Some products have barcodes some don’t. If you’re talking about a nationally manufactured product it probably has a U.P.C. So if you’re selling Palmolive soap or bandaids something like that. Some big very well-known product will usually have a UPC. If it’s a generic product maybe it doesn’t have one or certainly one you created yourself wouldn’t have a barcode unless you went out and got one.
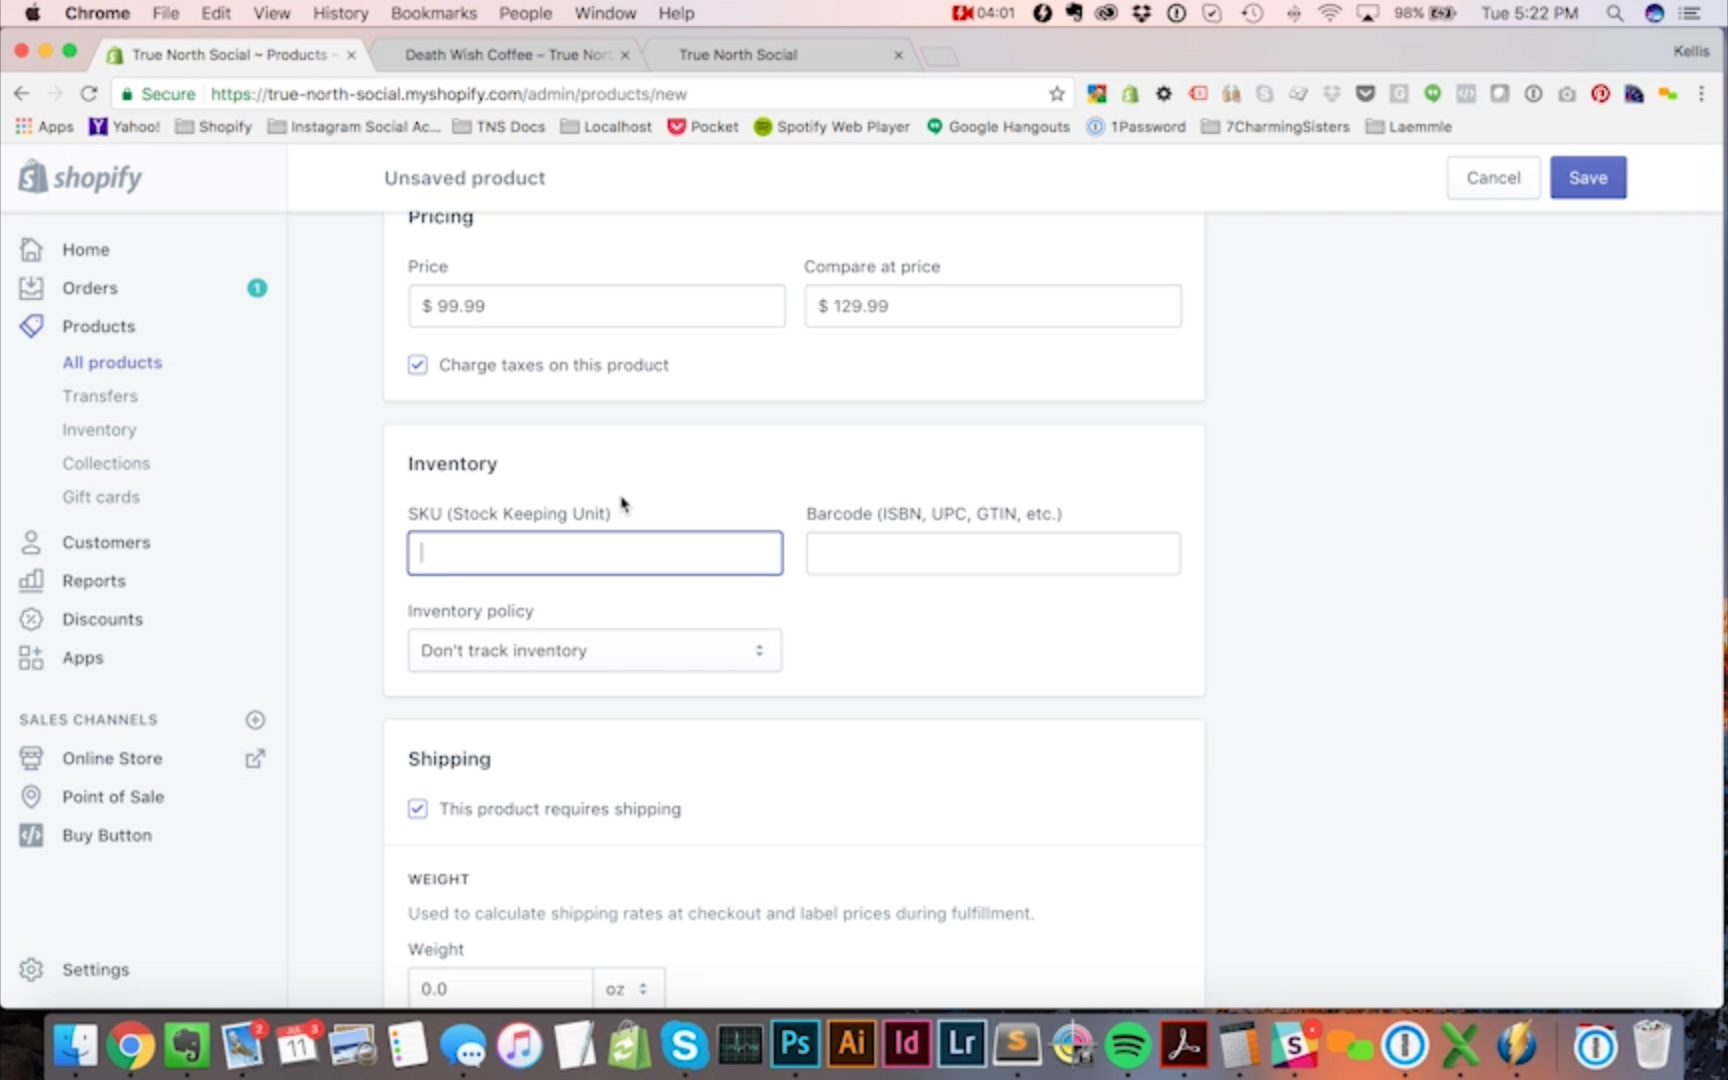
I am going to have my Shopify set in a track inventory. The reason I want to do this is if my inventory is set to zero, it will show a sold out, right. So right now I’m going to start with one right that’s the default and I’m going… I could allow customers to purchase this product when it’s out of stock but I’m not going to check that box because I want it to be sold out if I run out of stock.
This prior product requires shipping, course it does because it’s a physical product and this is a shoe. I’m going to guess off the top of my head this weighs twelve ounces and when I say for the sake of argument I’m not shipping this overseas so there’s no tariff code, right. You don’t have to worry about that unless you’re dealing with tariffs. If you’re new merchant I would say don’t worry about that until you start shipping overseas.
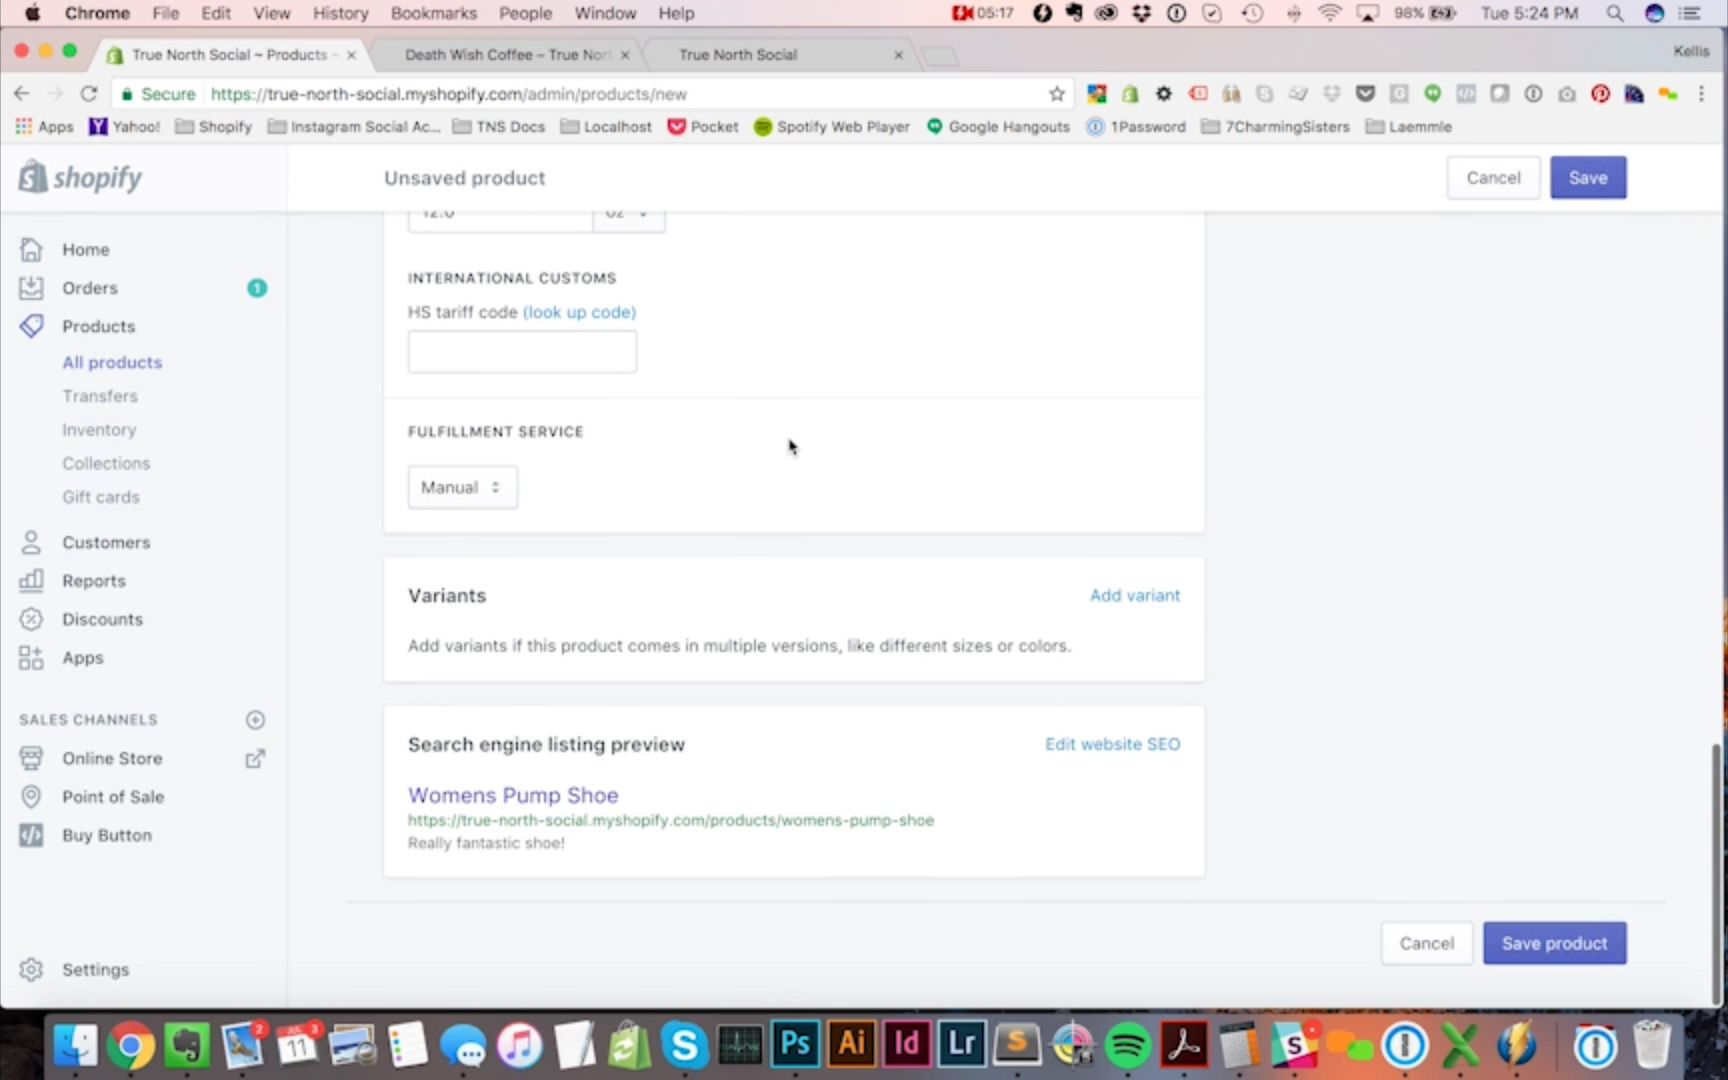
Fulfillment service; manual is the only one I have set up in this store so I’m going to leave that alone for now.
And we have variants down here I’m going to save …I’m going to not worry about that initially. I’m just going to save this product.
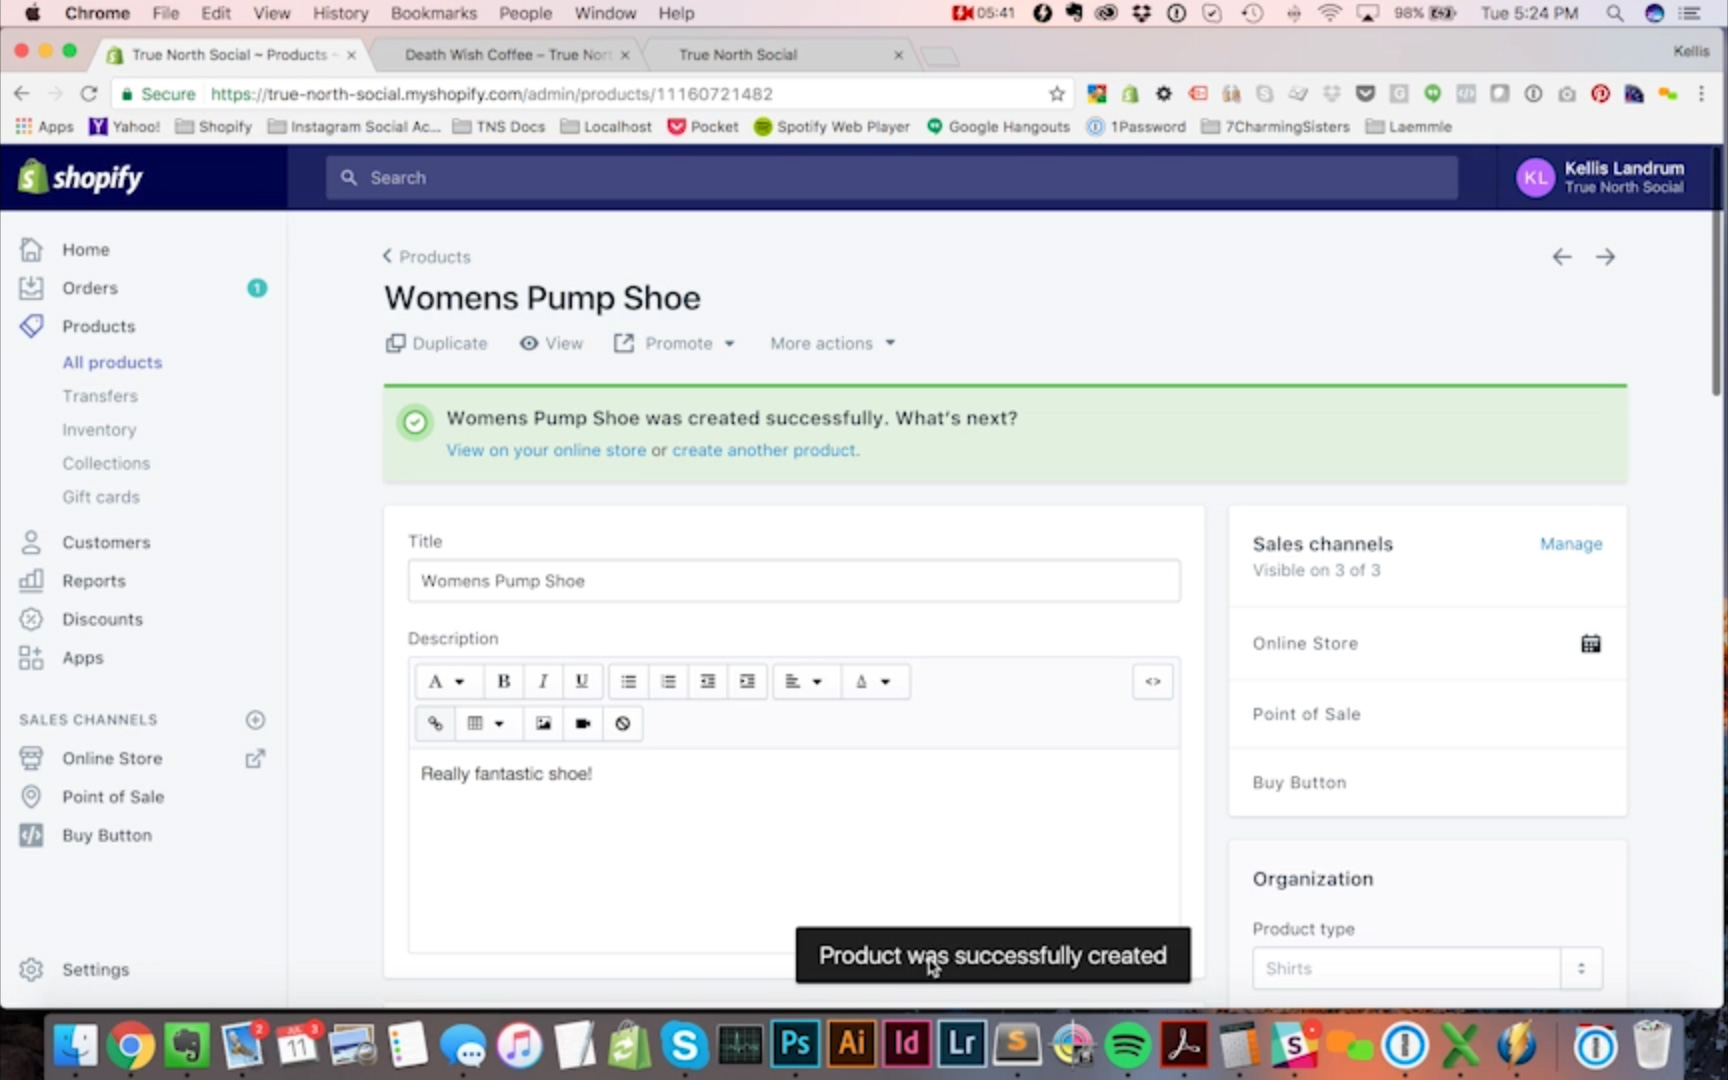
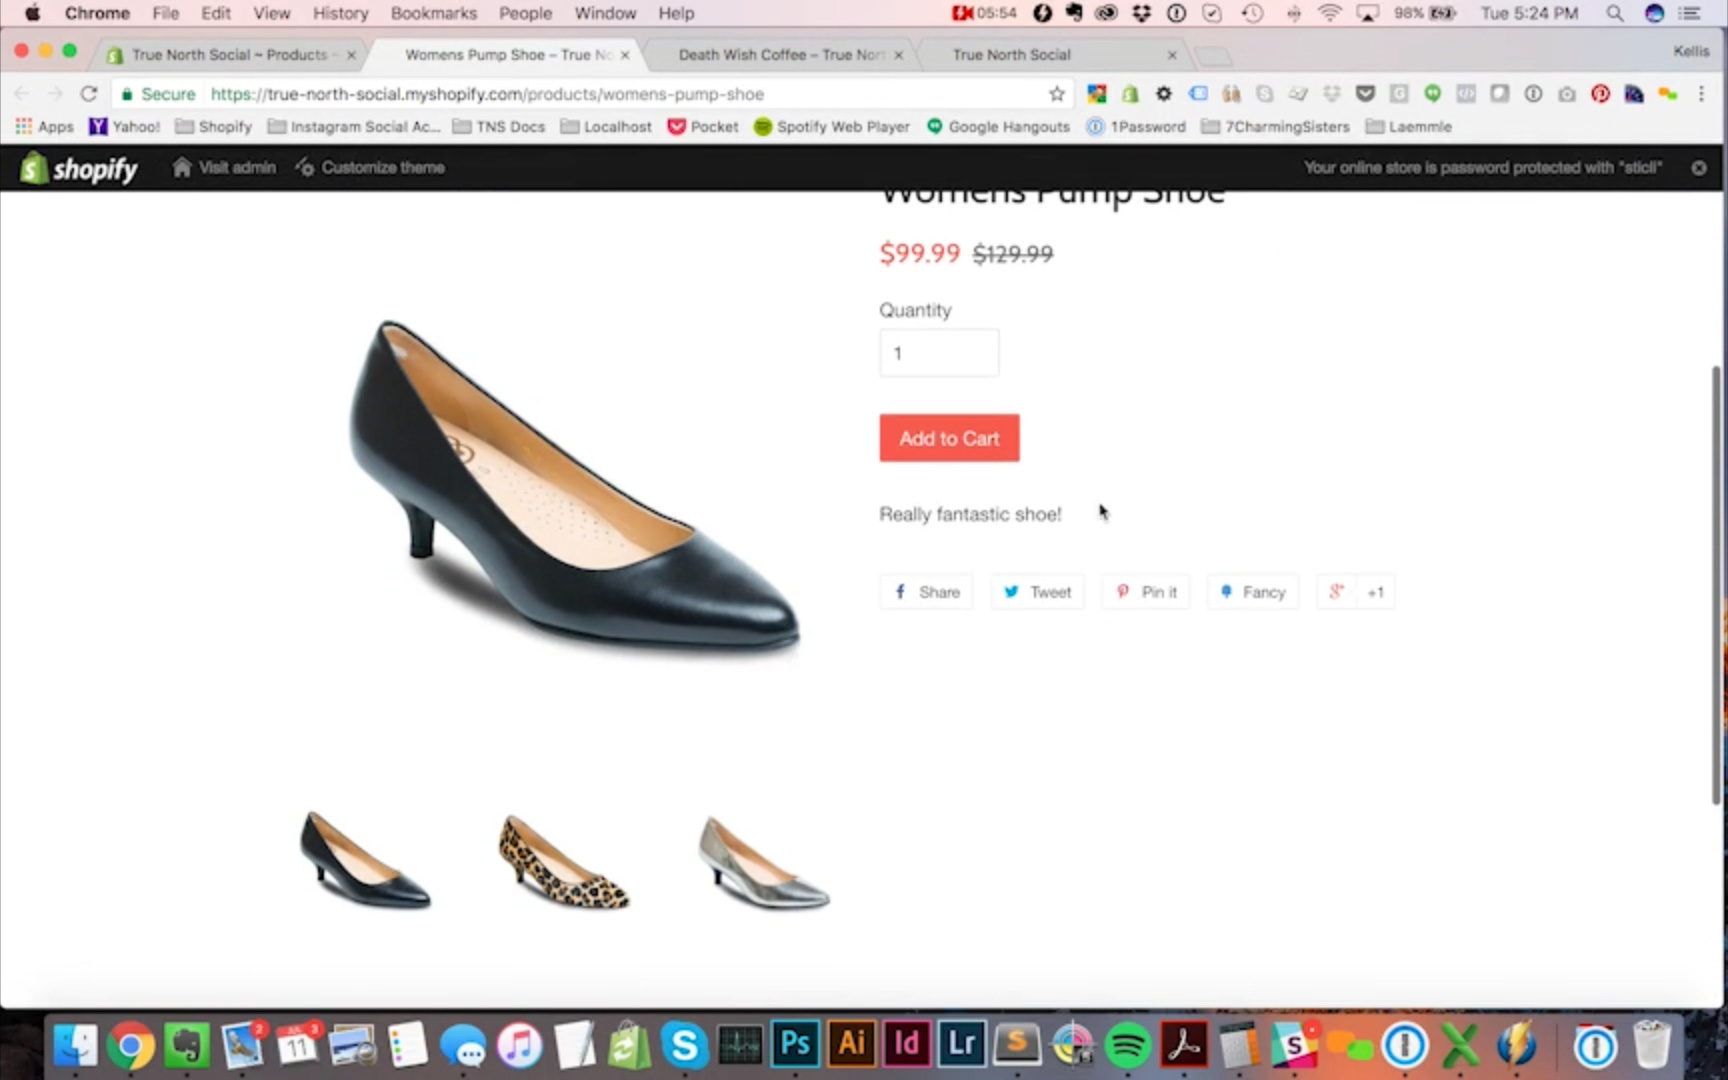
Now I see product was successfully created right. So now I have a product. I can click view here and I can look at this product on the front end. There is my product, really fantastic shoe. I could even add this to my cart if I wanted. You can see in my cart now has one in it.
Okay, so this is the black shoe but this shoe comes in black, in cheetah print and in silver. So I don’t have any way to select those colors. So let’s see how I might do that.
So let’s see the way we would create… We would set up a product to have different colors or different sizes is through variance, right.
Now this brings up an interesting point about the difference between… difference between a product in Shopify and a SKU, right. So this is true of basically any e-commerce system.
We might sell a product on our site that has multiple sizes right. So I can add an option for my product that is size right and I can say this product comes in size five. I’m hitting the enter key here to enter this value and size six and size seven and size eight, size nine and size ten, right. Now when we do this… this is an important thing to know. Each of these sizes can have an individual SKU. And the way I want you to think about this is if you had a warehouse full of product, you would probably have get boxes from your manufacturer and there one box would have size five, one box would have six, one box would have seven, one box would have size eight, size nine and size ten right. So, all of these would be individual SKU’s right.
Now I’m also going to add color here and I want to say my colors are black. Let’s capitalize this just to be nice Black is one size. What else do we have? We have cheetah, some sort of animal and we have silver, right.
So you’ll notice down here Shopify is creating variants for my product, right. So since I created options there are these variants. So there’s five; size five in black, cheetah and silver. Size six in black, cheetah and silver. Size seven in black, cheetah and silver, right.
Now I can assign SKUs for each of these different variants because in real life that is exactly what they have and Shopify very nicely has already been following my numbering system. I started with one and now it’s automatically filling two, three, four, five, six, seven, eight.
Now if you had SKUs that were set by a manufacturer, you can always change these, right. But if you want to just start simple and let Shopify do this for you and then have it assign SKUs and then follow this later, it’s a very easy way to do it, right. If there’s barcodes you can enter those manually. It’s a very nice little system.
So I’m going to hit save and it takes a second for my product to save. So my product was successfully saved. I’m to go back over to the front end. I’m looking at this. Oh! I don’t see any variation. I don’t see any variance. I’m seeing options or pull downs. Well, that’s because I saved it in the admin but I need to refresh it on the front end. So when I hit the refresh button on my browser. Now I can see. Okay, I’ve got sizes that I can choose from and I’ve got colors that I can choose from. So those are working shoe size seven and so I can choose cheetah. Well I chose cheetah and I would like the picture here to change to cheetah but it isn’t. So let’s see how we can fix that.
So I’ve got these variants saved here now and you’ll notice there’s these little icons next to all my products. So what I can do is I can say cheetah and I can click on this little icon and now it’s got the different images that I uploaded. So I can save that one. I’m just going to do a couple of these. I’m not going to make you sit through setting every single one. But I’m just going to choose a couple you know, cheetah and a couple of different sizes here. That one, okay. Let’s do silver and six just so we can switch around a little bit and silver in seven. And let’s see what happens here. Okay, variant has successfully saved. So my save button is grayed out because this it’s already saved.
Now when I go back over here. I have cheetah selected but it’s not showing the picture is because once again, every time I do something in my admin and I save, I have to update the page right. And now I’m saying I have cheated selected in size seven and it’s showing me the one… the picture that I have assigned to this variant. I can choose silver and now it’s switching because I’ve set pictures for this variant. Shopify has done a really good job of setting up this system. Make it pretty easy to assign the stuff.

Now let’s say for the sake of argument I wanted to have some of my products and different prices and different sizes be different prices. Let’s say for cheetah size five I want to have this be eighty nine dollars and the same thing for size six and size seven. I can adjust that. Oh! But you know what? My… I’m actually sold out of cheetah in size seven and in size six. So I’m going to set the inventory to zero. Now let’s see what happens. So I’m going to save that. Once again I have to refresh my page here. So got this in silver in size seven. Now for cheetah; cheetah’s inventory is set to zero. So my add cart to cart button automatically changes to sold out. It’s gray and I now when I click on it, I can’t add it to my product.
This is because I have sent this product to track inventory and I do not allow this product to continue selling even when the inventories has reached zero. So my product is sold out. If you want to continue selling even if you don’t have an inventory on hand if you know hey, I can get a new inventory pretty quick then maybe you keep selling. But if you know hey, if somebody buys this thing and I’m not going to be able to get inventory for another two weeks, I would rather just not sell it to them. Maybe they’ll pick another color or a, or a different style of shoe hopefully.
The last thing to notice about this is I can also delete any of my products and I can also click the edit button and I can go into a little bit more nuanced detail about these variants. I can toggle the things on and off like this product requires shipping. I can change the weight of it. I can say this particular inventory doesn’t or this particular variant doesn’t SKU, doesn’t track inventory and do some sort of micro changes to my variance here if I want to do that. And in fact let’s do that so now I’m going to save. And again I just want to update this on the front end and see what your variant… size five in black. So yeah, nothing should really particularly happen. So that’s variance and inventory.
So let’s take a look back at our product here and we can see some things here on the left hand side. Now the only things that we really… that are, that are really crucial over on this side are the making sure that your products are visible and by default they will be. You don’t have to change anything here if you don’t want. But if we look at sales channels this is Shopify’s mechanism for controlling where exactly do we want to sell our products. I have my store set up to sell for point of sale and if you wanted to include a buy button on another store you could. But this little calendar icon here is very handy.
So let’s say I know I want to start selling a product but I don’t want to start selling it today. I can click on this set publication date and I can choose a calendar date. Let’s say I don’t want to start selling this product until next Friday. I can set that and I can save it and now since I’m logged in, it will still show me this product on. Oh no! In fact it doesn’t. It’s a this product is no longer available so it’s prompting me to enter password.
So I’m going to just turn this… turn back the clock here to my current date and let’s see. Set this to publish at 5:30. Product was successfully saved. It may not allow me to go back again. Now there we go. Okay, so my product is published. Ok, so you can see that.
Now if you have product types in your store, you can set them here. This store doesn’t have product types but in fact I could create them here if I wanted to add shoe.
If you need to track product types for any particular reason you can. Need to create new ones you can do that right in line. Same thing with vendors right now True North Social is the only vendor that we have on here. So True North Social is the only thing it displays but these are actually Ukies brand shoes. So I could add Ukies as a vendor here if I wanted to track them so I don’t have to right.

So collections is something that most stores do use because most stores have some sort of categorization. Even if the collection is home page stuff is one of my collections very creative. We saw where I had to demo some suits on here. At some point let’s say I wanted to create a new collection for shoes. I can create a collection called shoes right in line with here. There, product was successfully saved. Let’s save let’s add this one. It’s already here so it’s stuff. Let’s say I haven’t created a collection it’s going to require me to do that outside of here. Now this is just searching for collection So it looks like it wouldn’t let me create a new collection for new product page. But I’ll show you how to do that real quick.
Tags; let’s say for some reason I wanted to have meta tag information on here, I can just add tags. If you need to reference things for some reason these are black, cheetah. These are kind of good for just adding information that somebody might use to search if you’re using the… if you have search on your site. If I set tags for colors of product in here they’ll probably come up through here. But I could say women’s shoes. If somebody were to search my site and I have a tag in here and it matches the search that they’re searching for, it would most likely return this product as a search result. I’m going to save and I don’t think anything in here is set to show up on the front end of my site. Let’s take a look here. Doesn’t … But let’s say stuff this that the other. Let’s say I wanted to add this product to… let’s add this product to a collection first. Let’s create a collection called shoes, let’s save that collection. Oh! I’m sorry we need to select our conditions.
There you can automatically create a collection based on certain conditions or you can manually select one. I just want to add this one product to this collection. So I’m going to manually do that. Now I’m going to click on add a product. So let’s say… what was my… women’s pump shoe. Now that is added to my collection.
So that is automatically saved and if I go back over to my products, see my product lists. You can see this is my women’s pump shoe. And now I can see this is with the shoes collection.
And so that is how you would add a new product to your store. And Shopify, pretty basic, pretty straightforward stuff.
If you need any help with this, True North Social is always here to help you with your e-commerce website needs. And I hope this helps you get an idea of how you can add new products to your Shopify store. Thanks a lot.
Check out all of our posts in the Ecommerce Website Design series:
E-commerce Website Design: Series Overview
https://truenorthsocial.com/ecommerce-website-design/ecommerce-website-series-overview/
E-commerce Headers and Footers – The most underrated piece of your Online Store
https://truenorthsocial.com/ecommerce-website-design/e-commerce-headers-footers-the-most-under-rated-piece-of-your-online-store/
Homepage Banner Best Practices for Shopify Online Stores
https://truenorthsocial.com/ecommerce-website-design/homepage-banner-best-practices-shopify-online-stores/
How to make a great homepage for your E-commerce Website
https://truenorthsocial.com/ecommerce-website-design/how-to-make-a-great-homepage-for-your-ecommerce-website/
What you need to know about your E-commerce Shopping Cart Page
https://truenorthsocial.com/ecommerce-website-design/what-you-need-to-know-about-your-e-commerce-shopping-cart-page/
How To Create New Products in Shopify – Video Tutorial
https://truenorthsocial.com/ecommerce-website-design/create-new-products-shopify-video-tutorial/
How To Create Collections in Shopify – Video Tutorial
https://truenorthsocial.com/ecommerce-website-design/create-collections-shopify-video-tutorial/
How To Create New Pages in Shopify – Video Tutorial
https://truenorthsocial.com/ecommerce-website-design/create-new-pages-shopify/