 Skip to content
A product image can make or break a sale. Consumers rely heavily on visuals when making purchasing decisions, especially in eCommerce where physical interaction with a product isn’t possible. This is where product photography lighting plays a crucial role—it doesn’t just illuminate the subject, it shapes the viewer’s perception of quality, value, and trust.
Proper lighting for product photography enhances colors, defines textures, and ensures that products appear as true-to-life as possible. Whether you’re photographing sleek electronics, shiny jewelry, or textured fabrics, lighting is the key factor that transforms an ordinary photo into a compelling, professional-looking image. Yet, it’s also one of the most misunderstood aspects of photography. Many beginners struggle with harsh shadows, uneven exposure, color distortion, and unwanted reflections—issues that can easily be resolved with the right product photography lighting setup.
Understanding the Role of Lighting in Product Photography
Lighting is not just a technical component of photography—it is the very foundation that determines how a product is perceived. From highlighting key features to creating an emotional connection, the way light interacts with a subject can elevate a simple image into a powerful sales tool. For anyone involved in eCommerce, branding, or marketing, understanding the role of product photography lighting is essential for creating high-quality visuals that convert.
Why Lighting Matters in Product Photos
Lighting is the silent storyteller in a product photo. It influences everything from clarity and texture to color accuracy and mood. A well-lit image reveals the details that matter: the grain of a leather wallet, the sparkle in a diamond ring, or the rich texture of a knitted sweater. On the other hand, poor lighting can result in flat, dull, or overexposed images that fail to engage viewers.
For example, a product shot taken with harsh direct light may cast deep, unflattering shadows that obscure the product’s shape or detail. In contrast, using soft, diffused lighting can create a balanced image that highlights the product evenly and naturally. This difference in lighting quality often separates amateur-looking photos from professional ones.
Whether you’re showcasing a small handcrafted item or a high-end electronic device, getting the lighting for product photos right ensures that potential customers see the product as intended—clean, accurate, and appealing. It builds trust and encourages conversions, making lighting not just an artistic choice but a strategic one.
Key Lighting Terminologies Explained
To master product photography lighting, it’s essential to understand some basic lighting concepts. These terms will help you make informed decisions when planning your product photography light setup:
Hard vs. Soft Light
Hard light creates sharp, well-defined shadows and is often produced by a direct, focused light source like a bare bulb or flash. It can add drama but may be too harsh for product photography. Soft light, on the other hand, is diffused and wraps gently around the subject, minimizing shadows and creating a more polished, professional look—ideal for most product images.
Natural vs. Artificial Light
Natural light, such as daylight coming through a window, is accessible and flattering but can be inconsistent. Artificial light, like LED panels, strobes, or softboxes, offers control and repeatability—key benefits for commercial and studio-based product lighting.
Color Temperature
Measured in Kelvins (K), color temperature affects the overall tone of your image. Daylight is around 5500K (neutral white), while incandescent lights are warmer (around 3200K). Using consistent product photography lights with the right temperature ensures that product colors remain true and accurate.
Light Direction and Diffusion
The angle and quality of light influence how shadows and highlights appear. Side lighting can reveal texture, front lighting minimizes shadows, and back lighting can create separation from the background. Adding a diffuser or softbox spreads the light evenly, reducing harsh shadows and glare.
Understanding these fundamentals empowers you to craft deliberate, effective lighting setups that make your products shine—literally and figuratively. Whether you’re just starting or refining your studio workflow, mastering these concepts is essential for professional product photo lighting.

Types of Lighting Used in Product Photography
Choosing the right type of lighting for product photography is essential to capturing professional, high-quality images. Each lighting type has its unique strengths and limitations, making them suitable for different products, budgets, and creative goals. Whether you’re working in a home studio or a commercial setting, understanding the differences between natural light, continuous light, and strobe or flash lighting will help you build the most effective product photography light setup.
Natural Lighting
Natural lighting refers to using sunlight—typically diffused through a window or open shade—as your primary light source. It’s one of the most accessible and cost-effective options for product photography, especially for beginners or those working with minimal gear.
The pros of natural lighting include its soft, flattering quality and the ease of setup. It’s perfect for lifestyle or editorial-style product shoots, such as handmade crafts, food, or apparel, where a natural ambiance is part of the brand aesthetic. It also works beautifully for flat lays and overhead shots, especially when shooting near a north-facing window or using sheer curtains to diffuse the light.
However, there are limitations. Natural light is inconsistent and changes throughout the day, making it difficult to maintain uniformity across a product line. Weather conditions, time of day, and indoor shadows can all affect the final outcome. For those who need consistency or plan to shoot in bulk, natural light may introduce unwanted variables in product photo lighting.
Continuous Lighting
Continuous lighting refers to any light source that stays on, such as LED panels, fluorescent lights, or tungsten bulbs. This type of lighting is particularly beginner-friendly because you can see exactly how the light interacts with your product in real time, which makes composing and adjusting your setup much easier.
One of the biggest advantages of continuous lights is that they’re excellent for both photography and video, allowing for a versatile studio setup. Many modern LED panels offer adjustable color temperatures, giving you greater control over the warmth or coolness of the lighting. They’re also relatively energy-efficient and remain cool to the touch, making them safe for long shoots or delicate subjects.
That said, continuous lights may not be as powerful as strobes, which can be a limitation when shooting larger objects or when you want razor-sharp clarity. In such cases, you might need longer exposure times or higher ISO settings, which can increase noise. Still, for small to mid-sized product shoots, continuous lighting provides a solid and reliable product lighting solution.
Strobe or Flash Lighting
Strobe lighting, also known as flash lighting, is a powerful and precise tool commonly used in professional product photography lighting setups. These lights emit a quick burst of high-intensity light, freezing motion and capturing even the smallest details with sharpness and clarity. Ideal for high-end products like electronics, jewelry, and cosmetics, strobes offer unmatched control and consistency.
One major benefit of strobes is their sheer power. Even with low ISO and narrow apertures, strobes can deliver properly exposed images with minimal noise and excellent depth of field. This is particularly valuable when photographing reflective or intricate products where detail matters most.
Strobe lighting also allows you to control every aspect of the scene—from shadows and highlights to background separation. When paired with light modifiers such as softboxes, umbrellas, or beauty dishes, strobes become highly adaptable for creating both dramatic and soft lighting effects.
However, strobes do come with a learning curve. Unlike continuous lights, you can’t preview the effect in real time without using modeling lamps. Additionally, strobes require syncing with your camera, often through triggers or built-in receivers.
Despite the complexity, strobes are the go-to option for achieving crisp, polished, and studio-quality results in product photography. For professionals and serious hobbyists alike, investing in a strobe system can take your product photography lights to the next level.

Product Photography Light Setup Essentials
Creating a high-quality product photography lighting setup doesn’t just rely on what type of lights you use—it’s also about how you use them. A well-structured lighting setup allows you to highlight your product’s features, eliminate unwanted shadows, and create an appealing composition that draws the viewer’s eye. Whether you’re shooting with natural or artificial lights, understanding how to arrange and modify your light sources is essential for capturing professional, high-converting product photos.
Key Light, Fill Light, and Back Light Explained
At the heart of most professional product photography light setups is the classic three-point lighting system. This configuration involves three main lights that work together to create balance, depth, and clarity in your image:
- Key Light: This is your primary light source. It should be the brightest and is usually positioned at a 45-degree angle from the product. The key light defines the shape, form, and main shadows of your subject. It’s the anchor of your product lighting setup.
- Fill Light: The fill light is placed on the opposite side of the key light and is used to soften the shadows created by the key. It should be less intense to maintain some dimension, but strong enough to prevent harsh contrast. A fill light helps ensure that your product’s details are visible without looking flat.
- Back Light (or Rim Light): Positioned behind or slightly above the product, the back light separates the product from the background by creating a subtle outline or halo. This adds depth and helps the product pop in the frame, particularly when shooting against white or dark backdrops.
Together, these three lights create a professional, balanced product photo lighting environment that flatters most product types, from apparel and cosmetics to electronics and jewelry.
Reflectors and Diffusers
While lighting is key, light control tools like reflectors and diffusers are just as important in refining the final image. These tools are inexpensive, easy to use, and can significantly improve the quality of your product photography lighting.
- Reflectors are used to bounce light back onto the product, filling in shadows or enhancing highlights. Available in different surfaces—white (neutral), silver (bright), and gold (warm)—they help you shape and redirect light without the need for additional bulbs. For instance, a silver reflector can add brightness to the shadow side of a watch or bottle, while a gold one might give a warmer tone to a skincare product.
- Diffusers are materials (like translucent fabric or plastic) placed between the light source and the subject to scatter and soften the light. This helps eliminate harsh shadows, reduce glare, and create even, flattering illumination. Using a diffuser with your key light is especially helpful when photographing reflective products such as glass, metal, or plastic.
Light Modifiers and Softboxes
To further control and shape your light, professional photographers rely on light modifiers—accessories that attach to or are used in conjunction with your lights to alter their output and quality.
- Softboxes are one of the most common modifiers in product photography. These box-shaped attachments diffuse the light evenly across the subject, creating soft shadows and minimizing hotspots. They’re perfect for lighting everything from clothing and accessories to gadgets and beauty products.
- Umbrellas come in two types: shoot-through (white) and reflective (silver or gold). They spread the light over a wide area, making them great for group or large product shots, but less ideal for precision lighting.
- Grids and Snoots allow you to direct light more precisely, reducing spill and giving you tighter control over highlights and shadows. This is particularly useful when you want to highlight specific areas of a product or add dramatic effects.
These product photography lights and accessories let you create various lighting styles—from bright and clean to moody and stylized—while ensuring that your subject remains the focus. Investing in even a few basic modifiers can significantly elevate the quality of your product photo lighting, helping you produce polished, professional results every time.

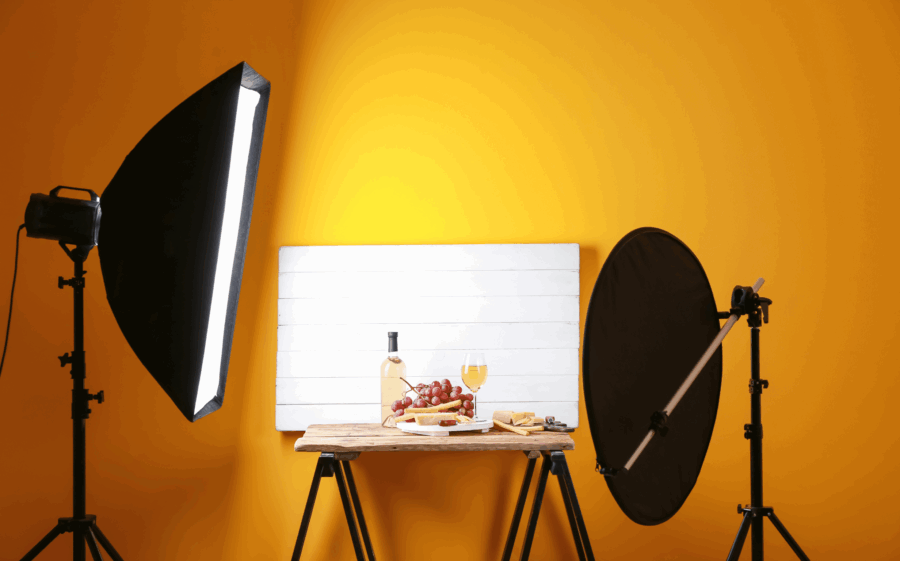
Setting Up Your Product Photography Lighting Environment
Creating the perfect lighting environment for product photography goes beyond just selecting lights. Your space, background, and camera settings all work in harmony with your product photography lighting setup to deliver professional, high-quality images. A controlled and well-prepared environment allows for consistency, accuracy, and visual appeal across your entire product lineup. Whether you’re shooting in a home studio or a professional space, thoughtful preparation makes a world of difference in the outcome.
Choosing the Right Space
Selecting the right location is the foundation of any successful lighting for product photography. Ideally, you want a space where you can control as many variables as possible. Look for an area that’s free from direct, uncontrolled light sources like overhead fluorescents or windows without blinds. The ability to block or shape ambient light is crucial, especially if you’re using artificial lighting for consistency.
Wall color also matters more than most beginners realize—white or neutral-colored walls reflect light softly and evenly, while brightly colored walls can cast unwanted color tones onto your product. A room with minimal distractions and neutral tones ensures that your lighting setup behaves predictably and that the focus remains solely on the product. When your environment supports your lighting strategy, your entire product lighting workflow becomes smoother and more reliable.

Backgrounds and Surfaces
Backgrounds and surfaces play a key role in how product photography lights interact with the subject. A clean white background is the most common choice for eCommerce photography because it reflects light evenly, isolates the product, and provides a distraction-free setting. It also helps maintain a professional and uniform look across multiple product shots. However, white backgrounds can sometimes bounce too much light if not properly controlled, leading to overexposure or loss of contrast. This is where diffused lighting and careful light positioning come into play.
On the other hand, textured surfaces—like wood, marble, linen, or colored paper—can add depth and context, especially for lifestyle shots or branded content. These backgrounds tend to absorb more light and may require stronger or additional light sources to maintain brightness and color accuracy. Understanding how light reacts to different backgrounds will help you make intentional choices that suit your product’s style and your brand identity. In either case, the interaction between light and background is essential to the overall look of your product photography.
Camera Settings and Light Sync
Even the best product photography lighting won’t yield strong results without properly adjusted camera settings. ISO, shutter speed, and aperture must be balanced according to your lighting setup. A lower ISO setting is preferred to reduce noise and maintain image clarity, but it requires sufficient lighting to achieve proper exposure.
Shutter speed controls how long light hits the sensor—faster speeds reduce motion blur but need brighter lights, while slower speeds can help in low-light settings but risk blur without a tripod. Aperture controls depth of field; for product photos, a smaller aperture (higher f-stop) often ensures that the entire product stays in sharp focus, though it also limits the amount of light hitting the sensor.
When using strobes or flash units, syncing your camera with your product photography lights becomes crucial. Cameras need to be timed to fire the flash at just the right moment—typically using a trigger or built-in sync system. If your shutter speed is too fast, you might end up with partial exposures where only part of the frame is lit.
Mastering these elements ensures your product is not only beautifully lit but also captured with clarity, precision, and professionalism. A seamless blend of light and settings results in standout product images that command attention.
Mistakes to Avoid in Product Lighting
Even with the right equipment and an understanding of basic techniques, many photographers—especially beginners—fall into common traps when it comes to product photography lighting. These mistakes can lead to images that feel unprofessional, misleading, or inconsistent, which in turn can affect brand trust and conversion rates. Recognizing these pitfalls and knowing how to correct them is essential for achieving consistently polished results with your product photography lights. Two of the most common and damaging lighting mistakes involve improper exposure and poor color control.
Overexposure and Harsh Shadows
One of the most frequent lighting mistakes in product photography is overexposure. This happens when too much light hits the camera sensor, resulting in blown-out highlights that erase detail from key parts of the product. Overexposure can make glossy products appear flat, distort the texture of fabrics, and even wash out labels or designs that are important for shoppers to see clearly. This issue often stems from placing lights too close to the product or failing to diffuse them properly.
Harsh shadows are another common problem. Strong, unsoftened light sources—like bare bulbs or direct sunlight—can create deep, distracting shadows that obscure parts of the product or make it difficult to see shape and dimension. These shadows often make images look amateurish and uneven.
To avoid these issues, always use diffusers or softboxes to soften your product photography lighting, especially on the key light. Adjust the distance and angle of your lights to control how they interact with the product. Use fill lights or reflectors to lighten shadows without flattening the image entirely. The goal is to maintain depth and contrast while still presenting a clean, detailed, and flattering visual of the product.
Ignoring White Balance and Color Consistency
Color accuracy is crucial in product lighting, yet many photographers overlook proper white balance settings, leading to images that misrepresent the actual color of the product. A product that appears too warm or too cool in photos can confuse or frustrate customers, especially if the color is a major purchasing factor, such as with clothing, cosmetics, or interior decor.
This mistake usually occurs when you mix different types of lights—such as daylight and tungsten—or rely on automatic white balance settings that can shift under inconsistent lighting conditions. These variations can make it nearly impossible to maintain a cohesive look across a product catalog or brand collection.
To maintain color consistency, always use lights with the same color temperature, ideally around 5000K to 5500K for neutral white light. Set your camera’s white balance manually or use a gray card to calibrate it before shooting. This ensures that your product photography light setup delivers accurate, reliable colors every time. Post-production color correction can help, but getting it right in-camera saves time and preserves the integrity of the original product appearance.
Conclusion
Lighting is the cornerstone of effective product photography. Whether you’re capturing images for an online store, a social media campaign, or a professional catalog, how you light your product directly impacts its perceived value, detail clarity, and emotional appeal. Mastering product photography lighting means more than simply turning on a lamp or positioning a flash—it’s about understanding the relationship between light and subject, and using that knowledge to shape the viewer’s experience.
Throughout this guide, we’ve explored the critical aspects of professional product lighting: from choosing between natural, continuous, and strobe lights to setting up a balanced three-point lighting arrangement using tools like diffusers, reflectors, and softboxes. We also highlighted the importance of selecting the right environment, managing camera settings, and avoiding common mistakes such as overexposure or inconsistent color temperature. These principles form the foundation of a powerful and reliable product photography light setup.
More than just a technical requirement, lighting is a creative tool. It has the power to tell a story, define a brand’s aesthetic, and influence a buyer’s decision. By experimenting with different light sources, modifiers, and angles, photographers can find their unique style and continually improve the quality of their work. Over time, investing in better gear and expanding your lighting knowledge will pay off with sharper, more professional images that build trust and drive conversions.
Ultimately, good product photo lighting doesn’t just make your products look better—it makes them more sellable. Treat lighting as both an art and a science, and it will become one of your most valuable assets in visual marketing.
FAQ’s
What is the best lighting for product photography?
The best lighting for product photography depends on your product type, style goals, and budget. For clean, professional images, many photographers prefer strobe or flash lighting due to its power, consistency, and crisp results. However, continuous LED lights are great for beginners or video content, offering real-time feedback. The key is to choose lighting that provides control over shadows, direction, and intensity.
Can I use natural light for product photos?
Yes, natural lighting can work well for product photography, especially when shooting lifestyle images or when working with a limited budget. North-facing windows provide soft, indirect light that is ideal for clean, minimal shadows. However, since natural light is inconsistent and changes throughout the day, it’s not always reliable for batch shooting or precise color representation.
What are the most common light setups used in product photography?
The three-point lighting setup—featuring a key light, fill light, and back light—is the most widely used for product photography. This approach creates a balanced, well-lit image with controlled highlights and shadows. Additional tools like reflectors, diffusers, and softboxes are often incorporated to fine-tune the setup and achieve a more professional look.
How do I reduce shadows in product images?
To minimize harsh shadows, use soft lighting through diffusers or softboxes. Adding a fill light or reflector on the opposite side of your key light can help even out shadowed areas. Position your light source further away or increase the light size relative to the subject for softer, more flattering illumination.
What is the ideal background for product lighting setups?
A white background is most commonly used because it reflects light evenly and keeps attention on the product. For more creative or lifestyle-driven shots, textured or colored surfaces can add visual interest—but may require more complex lighting to control reflections and shadows.